 Before actually enabling the WAF feature on your production Citrix ADC, you should read this article!
Waf will change the behavior of all your vServers!
We find Citrix WAF in the security section. Similar to all other features, a WAF policy consists of a profile (action) and an expression. (the difference between a profile and an action is the complexity. WAF profiles are highly complex)
Setting up the test environment
Create a new load-balancing vServer. We use HTTP to make debugging a bit easier. We don’t explain how to do load-balancing. Go to this chapter if you don’t already know (WAF is not suitable for beginners!)
vServer
- name: lb_vs_waf
- Protocol: HTTP
- Address type: IP Adress
- IP address: 192.168.229.100
- Port: 80
Service
If you didn’t already create this service, create a service for our red test environment and bind it to the vServer lb_vs_waf
- name: sc_red
- Protocol: HTTP
- Port: 80
- Server: red.wonderkitchen.network (93.83.148.43)
The WAF Profile
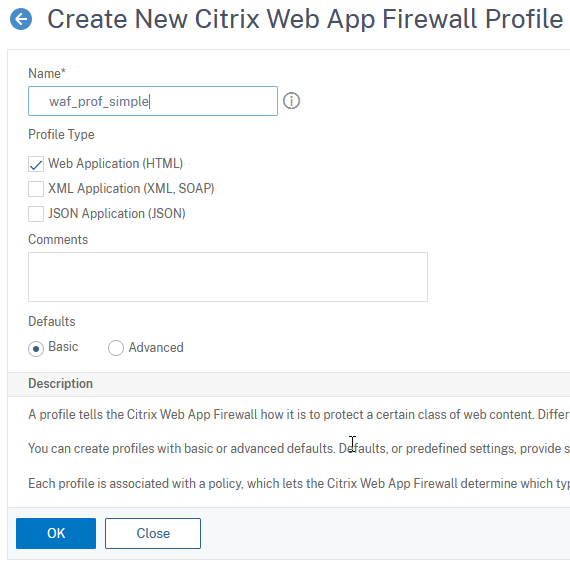
Go to Security → Citrix Web Application Firewall → Profiles. Create a new profile.
- name: waf_prof_simple
- Profile Type:
- Defaults: Basic
Don’t do any changes to this profile by now.
The WAF Policy
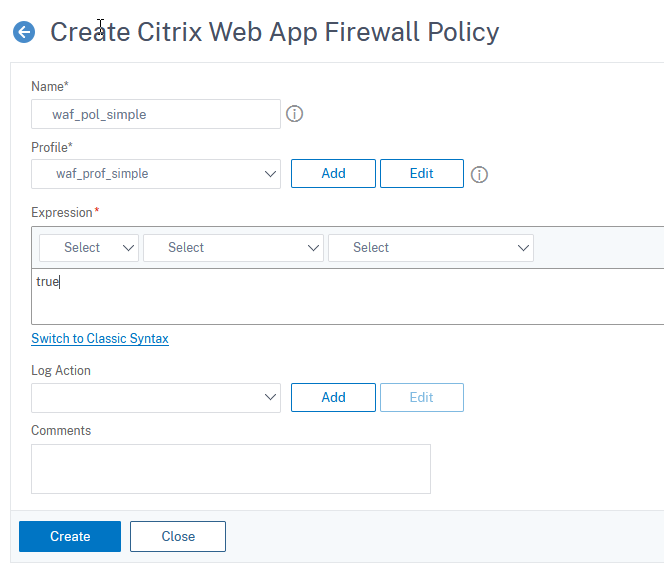
Go to Security → Citrix Web Application Firewall → Firewall → Policies. Create a new policy.
- name: waf_pol_simple
- expression: true
- profile: waf_prof_simple

Bind this policy to lb_vs_waf.
[wpedon id=”798″ align=”center”]
